Featured
Manicure at home: Step by step
Introduction:
In today's busy world, finding time to visit a salon for a professional manicure can be a challenge. Fortunately, with a little practice and the right tools, you can easily give yourself a salon-quality manicure at home. In this post, we'll dive into the details of each step involved in achieving a perfect manicure and provide you with some additional tips and tricks for a flawless finish.
Step 1: Remove Old Nail Polish
The first step in achieving a professional-looking manicure is to remove any old nail polish. For this step, you'll need an acetone-based nail polish remover and a cotton pad. Dip the cotton pad in the nail polish remover and gently wipe away the old polish. Be sure to remove all traces of the old polish, especially at the edges of your nails. This helps to ensure a smooth and even application of the new polish.
Step 2: Soak Your Hands
After removing the old nail polish, it's time to soak your hands in warm, soapy water for about 5-10 minutes. This will help to soften your cuticles and nails, making them easier to work with. You can also add some essential oils or bath salts to the water for added relaxation.
Step 3: Shape Your Nails
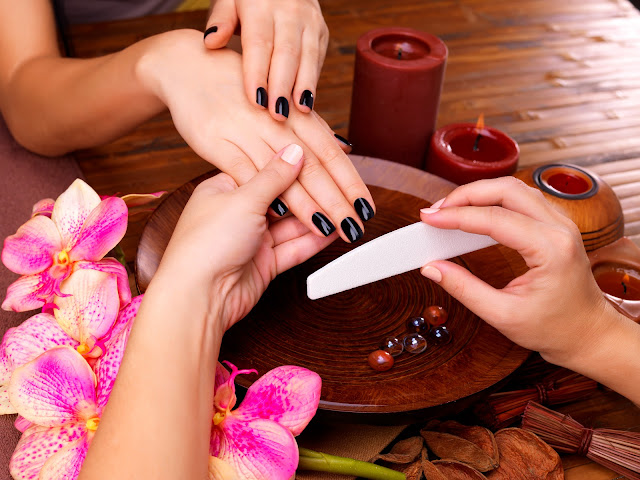
Once your hands are fully soaked, use a nail file to shape your nails. Start at one edge of the nail and file towards the center in one direction. Avoid using a sawing motion, as this can cause the nail to split. Once you have achieved your desired shape, use a buffer to smooth out any rough edges. This step helps to give your nails a polished and professional look.
When choosing a nail shape, it's essential to consider your lifestyle and daily activities. For example, if you work with your hands or have young children, shorter and rounded nails may be more practical than longer and pointed nails.
Step 4: Push Back Your Cuticles
After shaping your nails, it's time to push back your cuticles. Use a cuticle pusher to gently push back the cuticles, taking care not to damage them. This step helps to create a clean and neat look around the nails.
Step 5: Moisturize Your Hands
Once you have pushed back your cuticles, it's time to moisturize your hands. Use a hand cream or lotion to moisturize your hands and cuticles. This step helps to keep your hands hydrated and nourished, preventing dryness and cracking.
Step 6: Apply Base Coat
Now that your hands are prepped and ready, it's time to apply the base coat. A base coat helps to protect your nails from staining and makes the nail polish last longer. Apply a thin layer of base coat to each nail, starting from the base of the nail and working your way to the tip. Let it dry completely before moving on to the next step.
Step 7: Apply Nail Polish
Once the base coat is dry, it's time to apply the nail polish. Choose your desired color and apply a thin layer of polish to each nail, starting from the base of the nail and working your way to the tip. Be sure to wipe off any excess polish on the brush before applying, as this helps to prevent streaks and clumps. Apply a second coat of polish if necessary, waiting for the first coat to dry completely before applying the second.
Step 8: Apply Top Coat
Once the nail polish is dry, it's time to apply the top coat. A top coat helps to protect the nail polish and makes it last longer. Apply a thin layer of top coat to each nail, starting from the base of the nail and working your way to the tip. Let it dry completely before moving on to the next step.
Step 9: Clean Up Excess Polish
After the top coat is dry, it's time to clean up any excess polish. Use a cotton swab dipped in nail polish remover to clean up any polish that may have gotten on your skin or cuticles. This step helps to create a polished and professional look.
Step 10: Let Your Nails Dry
Finally, allow your nails to dry completely. This can take anywhere from 15-30 minutes, depending on the thickness of the polish layers. Avoid touching or bumping your nails during this time to prevent smudging or ruining the manicure.
- To prevent chipping, avoid hot water and harsh chemicals for the first few hours after your manicure.
- Use a quick-dry top coat to speed up the drying process.
- For a longer-lasting manicure, reapply the top coat every few days.
- Use a cuticle oil or cream to keep your cuticles healthy and moisturized.
- Use a nail strengthener if your nails are weak or brittle.
- Experiment with different nail polish colors and designs to add some variety to your manicure routine.
With these tips and tricks, you can easily achieve a salon-quality manicure at home. Practice makes perfect, so don't be discouraged if your first attempts aren't perfect. With time and practice, you'll become a pro at giving yourself a flawless manicure.
- Get link
- X
- Other Apps
Comments
Popular Posts

5 Best Concealer Dupes: Affordable Alternatives to High-End Brands
- Get link
- X
- Other Apps

5 Best and Affordable Makeup Setting Powders for Dry Skin
- Get link
- X
- Other Apps

V Informative 👏
ReplyDelete❤️💐
DeleteNice
ReplyDeletethanks alot
Delete